Posted by: jbaner | August 9, 2017

Mini Wholecloth class

What a pitiful blogger I am!! Again, nearly 5 months since my last post. The good news is that I have been very busy, so I don’t think about blogging much. But recently I was sent a photo of a mini wholecloth quilt that one of my students did in a class I taught in June. So I wanted to share some photos of the class, the process, and her finished result. She did a really nice job!

To make a wholecloth quilt, you need to start with a design. Since I wanted my students to be able to accomplish and complete one easily, we made “mini’s” (the size of a fat quarter). I provided them with two different designs of simple sunflowers with leaves, or they could bring their own design. I had one student bring a rose. The others used the sunflowers. I also provided some fluffy polyester batting to provide more loft behind the flower. Everybody had a great time and all got a good start on their quilt.

Here’s Dawn’s almost finished quilt (stitching complete, still needs binding):

Dawns sunflower

She found as most do with dense quilting that the fabric can get distorted. That is why I recommend you starting out with a bigger piece than you want for the finished project. Next I recommend that you soak or “block” the quilt before attaching the binding. By submerging it in cold water, you can remove all the water soluble ink you used to mark the design and it will help with shrinking all the fibers at once. Roll it in a towel to take out all the excess water, then lay flat to dry. You can do this on a flat surface with a towel to absorb the rest of the moisture, or even on a design wall. You then use a tape measure and manipulate the fabric to make the design square. If doing it on a design wall, pin the edges to where you want them so they dry square. Then you can trim excess fabric off ensuring it is square. You can trim before blocking, too, if you prefer. Try both ways to see which works best for you. Then attach the binding.

Happy Stitching!!

~Jo

Posted by: jbaner | March 13, 2017

Mini Wholecloth

It’s been nearly 4 months since I blogged. We had a long, cold, snowy, icy winter here in the Pacific Northwest. I had to deal with some health issues and now am feeling much much better and am getting creative again.

I teach a free-motion quilting class at a local sewing machine store. I’ve always wanted to follow it up with another class where students could put to use the skills they learned in that class. I’ve finally came up with a mini wholecloth class where the students can probably stitch the whole thing in one day. It took me about 3 hrs for the stitching and maybe an hour to prepare it.

Here’s a couple of designs I came up with:

This first one was done a light colored yellow/peach batik fabric. It pretty much reads as a solid. I started by drawing a circle in the center, then the petals of the flower, then the leaves. The rest is all free-motion without any markings, but of course, you could if you wanted to. I used a light cream colored thread, so the quilting is the star. I also used two layers of batting. The bottom Hobb’s 80/20 because that’s what I had. You could use a cotton one, too. Then I used a mid-loft polyester batting on top of that. It really makes the motif stand out around the thread.

Sunflower 1

Mini Wholecloth Sunflower Quilt

This second one I purposefully did on a not so solid reading batik. It has far more contrast and you can see how it distracts from the quilting itself. So to make a wholecloth, you really do need to stick to a solid or reads as a solid fabric. It doesn’t necessarily need to be light in value. I’ve seen striking wholcloths in darker colors. The thread color really does play a huge role. It all depends on how you want it to look. I used a light to medium peach colored thread for this one for the flower and a light green for the stem, leaves, and background.

Sunflower 2

Mini Wholecloth Sunflower 2 Quilt

Free-motion quilting is so much fun and I love to see the designs pop out with just the use of threads on a plain whole fabric. Don’t you?

I’ll be teaching this class at Quality Sewing in Bellingham, WA in May….so if you’re in the area and are interested, please contact them to sign up. See you there!

Happy Quilting!

~Jo

Posted by: jbaner | November 20, 2016

Creating depth

I haven’t blogged since September…..can’t believe how busy I’ve been and just haven’t gotten to it. But hanging on my design wall are three little pieces I did as an exercise for my ongoing class with Hollis Chatelain. She wanted us to create depth in a small piece with just threads. We were free to choose our own subject. It could be abstract, pictorial, landscape, etc….

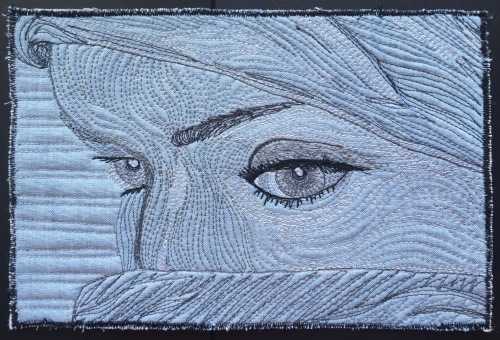
I have been fascinated with portraits for a while now, so I decided to do one with threads. I found a great photo that had just the eyes showing. I chose a medium blue as my background fabric (we could choose anything). The first one was done with a range of values of grays with black as the darkest and white and the lightest. It is 7″ wide by 5″ high.

B&W&Gray

The second one is done with a range of values of blue since that is the color of the background fabric. (sorry the exposures didn’t turn out the same, but the fabrics are all the same)

Blues

The third is using whatever colors I wanted as long as I used the full range of values from dark to light.

All colors

This was a great exercise and it’s pretty obvious that depth is created with using a full range of values (dark to light). I like the third one the best and feel there’s the most depth in it. I feel the second one with all blues has the least amount of depth even though I used the full range of values. So that brings in the idea of contrast. I think having colors from both sides of the color wheel also added to the depth. The first one with the gray, black and white again had a full range of values. It may have had more depth on a different colored background fabric…..maybe something I should try to find out! If I can find the time and motivation, I’ll do it and send you a follow up.

Hopefully, this has been useful to you and motivates you regarding how you choose fabric and thread colors in your own quilting.

Happy Quilting!

~Jo


Posted by: jbaner | September 8, 2016

How to Square a Quilt

A few weeks ago a new client of mine and fairly new to quilting herself, asked me….how do you square a quilt? She asked because I always measure a quilt I take in to make sure it’s “reasonably” square so I won’t run into major problems loading or quilting it.

A lot of new quilters believe it is the last step you do before you quilt it….or even the last step you do before you bind it. And then, there are those who don’t care…..

Taking a ruler and trimming off the edges sometimes works….but not often. If you have to trim off as much as a 1/4″ on a 4″ border, the eye is going to notice. So I don’t recommend you do that. If it’s not very far off, you can make the adjustment by cutting the batting/backing a bit bigger to make it square as long as you have enough of the top edge of the quilt to catch in the binding. On a very large quilt that is going on a bed, having it not square is not really going to matter. Only if you are hanging it on a wall, or putting it in a show, will it be noticed.

But if you do care about your quilt be square, then I suggest that it is the FIRST step you take when you start a quilt and it is the NEXT step you take after you’ve sewn a seam. In other words, to get a quilt to turn out square, you have to make everything square as you go. When you do that, in the end it will be “relatively” square.

Fabric is fluid, stretchy, and can be manipulated quite easily. So the first thing to know is how the straight of grain runs (along the length of the bolt, or the same direction the selvedges run). The selvedges are the finished edges that have a tighter weave and sometimes you can see the large holes left behind from the tacks used to hold the fabric in place as it’s dyed or printed. When fabric is woven, the “warp” is the lengthwise threads on the loom which has the most tension on it. The “weft” is the crosswise threads that are woven over and under the warp threads at a 90 degree angle. It has a bit more stretch when tugged that way. Any other angle of the weave is considered “bias”. At 45 degrees is the true bias and has the most stretch. But really any bias angle has stretch.

Now that we know something about the nature of fabric and it’s ability to stretch, we can minimize our quilt going “out of square” by first cutting accurately. Cutting long lengths of fabric with the grain can be costly and wasteful, so most quilters will cut across the grain and treat is like the grain. This is acceptable because there is only a slight difference in stretch. Another way to stabilize the bias of fabric is to use a paper or cloth foundation. That way you can cut any direction you want and keep the edges stable. The most common error is working with triangles. When working with triangles you always want to have the straight or cross grain on the outer edge. The bias should always be the edge that is sewn to the inside. There are many techniques written on how to achieve that. I have a video on how to make “Half-Square Triangles”.

Once you have cut properly, then sewing a straight seam is the next step. The best way to keep the seams straight is to pin. I have to admit that I “cheat” on small blocks and do not pin, but once they get bigger, I always pin. The other essential tool is to have an accurate 1/4″ foot on your machine. I always look to make sure I can see the edge of the bottom fabric as I’m sewing. If you can’t see it you run the risk of it going way off underneath and having a very narrow seam allowance or a non-sewn gap that can easily come apart and is no longer square.

Before continuing to sew blocks together I always press. You can easily chain sew before pressing, but if you are sewing a seamed piece to another, then pressing is an absolute must. The reason for this is, that the seam needs to be completely flat. You can press to one side, or open….whatever works best for your project. But you want to make sure you do not have a “lip” of fabric to one side of the seam. That will make a difference on the size of your block. In a pinch finger pressing works, but pressing with an iron is best.

As you are sewing patches, you want to take a moment to check to see if the resulting block is the size it’s suppose to be. Some techniques call for making them bigger and cutting them down to square. That is fine as long as your patches and blocks are the size they are suppose to be.

As you sew the blocks together either in rows or larger blocks, take the few minutes you need to check to see they are square. You’ll be glad you did. If the body of your quilt is square when you start to add borders, then they will go on easier. If it is not, then you will be compounding the degree it is off exponentially as the borders are added.

Am I saying that it has to be perfect???? NO! Fabric is fluid and can be manipulated, but only to a certain degree. On a queen or king sized quilt, I can ease is up to 2 inches difference on an edge without adding a pucker or pleat, but beyond that it’s really difficult. So when adding borders, you can manipulate the body of the quilt to be square. You can see how I do this in my video “How to add borders”.

When I find a quilt is way off and it has more than one border, the problem usually starts with the very first border or even the body of the quilt. That is why I’m an advocate of keeping things straight as you go. Because of this, some call me a perfectionist (see a previous blog post on perfection)….but I’d rather consider myself a detail person because getting the details to work make me happy…..very happy when I don’t have to rip and re-do things!!

So to summarize, follow these steps to make your quilt square:

  1. Cut accurately along the straight or cross grain of the fabric.
  2. Sew an accurate 1/4″ seam.
  3. Press your seams before sewing another piece on it.
  4. Check the size of the patches or blocks and correct if necessary before moving on.
  5. Continue checking the size of the blocks and rows as they are being assembled.
  6. Add borders on correctly, easing in any fullness as you go.
  7. Once the top is quilted, it should remain “relatively” square.
  8. The back and batting can be trimmed square and have the binding hide any small amount that may be showing.

Following these steps should make your quilt square and you very happy!!

Happy quilting!!

~Jo

Posted by: jbaner | August 29, 2016

My recent artwork

Today I’m going to share with you what I’ve been up to in the last few months. I haven’t had the time or motivation to make any large quilts, but some small art quilts are my passion anyway. I may have shared some of these in the past, but thought I’d share again. I recently enter a couple of them in the NW WA fair and came home with two blue ribbons.

The first one here a challenge quilt I made for our guild’s tea we have with a sister guild in Canada. The challenge was “hats”. So I used the “hat trick” pattern for the background and did it using 3 different red fabrics very close in value and shade. Then I appliqued the hat with a model’s face under it on top of the background. I almost didn’t because I really liked the quilting that I did on the “hat trick” pattern. That may motivate me to make a larger quilt like that. This is about 24″x 24″.

Hat Trick Full

Hat Trick

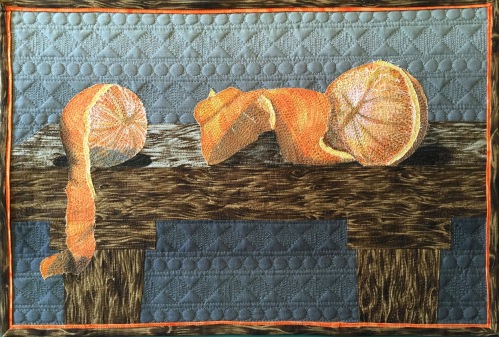
The next one I made as an exercise for lesson in a class I’m taking. It was to create linear vs organic lines with the fabric….not the quilting lines as we normally do. This was a lot of fun to make. Again, I may make something similar in a larger scale. It is 18″ x 12″. It has been juried into the LaConner Quilt and Textiles Museum Quiltfest in October.

IMG_2776 (1)

A-Peeling Oranges

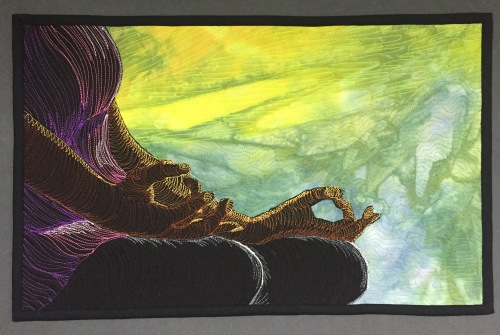
The next piece is a commissioned art quilt similar to my Serenity quilt I did last year. The first is “Serenity”. The second is “Sunset Meditation”.

serenity full

Serenity

Sunset Meditation

Sunset Meditation

And last but not least I’ll share with you two of my colored pencil drawings I’ve done in the last few months. The first is “Stanley” which I entered in the NW WA fair and received a blue ribbon and “Best of Lot”. The lot was the pencil category in the senior division!! Still hard to believe I’m a senior, but so be it! The second is of my other cat “Sunny” which I just finished this weekend.

Stanley CP drawing

“Stanley”

Sunny

“Sunny”

Well, I hope you’ve enjoyed my little show. I’ve had fun creating all these pieces of art. There will be more to come!

~Jo

Posted by: jbaner | August 28, 2016

Adding to Your Backing for a Longarm Quilter

Thank you….this is so well written. I’m reblogging this for my followers from Heartbeat Quilting. It is difficult to center something on the back and when adding a “frame” on the back…..it never comes out even. The reason for this? We longarmers can’t see it for one, and two, we can’t account for the distance of rolling on the bars or the shrinkage that occurs with the quilting. Hope this helps explain all that.

Posted by: jbaner | August 25, 2016

Mini Quilt Show

I keep telling myself that I will blog more frequently, but it seems that I spend most of my time quilting and the blogging gets put aside. I’m going to try to build in some time to do it more frequently, but forgive me if I don’t.

So today I wanted to share with you some awesome quilts created by my clients that I had the privilege to quilt.

This first one was pieced by Jan Furrenes called “4th of July”…..although she contemplating changing the name to “6 years/11 months”. It took her 6 years and 11 months to paper foundation piece it. It took me 5 days to quilt it.

This slideshow requires JavaScript.

These next two were pieced by Reynola Pakusich. The first one is called “Silk Circles” and the second a traditional “Mariner’s Compass”. She is having a third floor showing at the LaConner Quilt and Textile Museum running August 31 – Oct 2, 2016. There is a free opening reception on September 7 from 4-6pm. Click here for more information.

This slideshow requires JavaScript.

This next quilt was pieced by Anne Gouiller-Moore. It is called “Chicken Buffet”. She made this in a class taught by Diane Brown at Quality Sewing in Bellingham, WA. It is so cute! I regret not taking a photo of all 12 chickens….but at least I have a few of my favorites. She did a wonderful job putting it together.

This slideshow requires JavaScript.

This next quilt was pieced by Becky Darden. It is called “Hexy”. She’s branching out into more artistic quilts. She wanted the hexagons to be the main focus, so I kept the blue side to the left very blended. I did sneak in a few thread stitched hexagons, but you have to look really hard to see them because of the blending thread. Hope you can see it on the one close up photo I took of it.

This slideshow requires JavaScript.

OK….that’s all I have for now…..got to get back to more quilting. But my next post I’ll feature a couple of things I’ve been doing for myself.

Until then…..happy quilting!

~Jo

Posted by: jbaner | August 6, 2016

Do you want to be perfect or happy?

I have often in the past been accused of being a perfectionist. In the past I was proud to be one, until I noticed how my mother who was also a perfectionist, found extreme frustration and unhappiness when she could no longer be perfect once she started down the road of dementia.

I learned a lot from her regarding this subject. I realized that being a perfectionist left very little room for me to make a mistake and still feel good about myself. There was always that drive to do it over and over again until it was “perfect”, so I could feel good about myself and my work.

I have spent a fair amount of time contemplating this subject. My work is far from perfect. If you don’t believe me, then ask the quilt judges who have judged my work and found it FAR from perfect! I also have spent a lot of time looking closely at the quilts in a big quilt show that have won first place, or awards of excellence, or best of show, and have found that they are indeed nearly, if not perfect. I often wonder how these artists feel about themselves and their work.

So I have taken the heat off myself by not having everything I do needing to be perfect. Once I did that, I was much happier. The pressure was off. But what I did discover was that when I did something that was “not good enough”, I chose to rip and re-do. Or when I’m putting my work together, I find that if I pay attention to the details like cutting my fabric straight, or making my seams as near “perfect” by knowing my machines and tools really well, everything fits together better and find myself so much happier because I don’t have to rip and re-do.

To summarize, a perfectionist is one who views everything they do needs to be “perfect” at least in their eyes. When they do not perform up to that standard, they are not happy and do not feel good about themselves. I witnessed this in my mother.

But I label myself as one who pays attention to details which is much different than being a perfectionist. Details make me happy. Being perfect (nearly impossible to do) does not.

Sometimes when I teach a class, I am still accused of being a perfectionist. But my response is always the same: I am not perfect and I don’t require you to be perfect….you can ignore my techniques and do it your way, but paying attention to the details (so it turns out the way I want it to) makes me happy.

So I ask you again….do you want to be perfect or happy?

Happy Quilting!!

Jo

Posted by: jbaner | July 6, 2016

Master Art Class with Hollis Chatelain

The first week of June I traveled once again to Oregon for the Master Art Class with Hollis Chatelain. This is our 8th year. This year focused on hand-dyed fabrics. Prior to the week, I went to a classmates house near Portland and 3 of us dyed fabrics at her house before the class. I’m not sure that any of us actually used any of the fabric we dyed. I know that I used fabric that I had dyed several years ago and a piece I had purchased in Canada many years ago. Here’s what we ended up with:

IMG_2791

We started out by doing exercises that emphasized a lesson. I am always pushed beyond my box with these. Mainly because we are given just minutes to come up with a decent design, which is my toughest task. I always need lots of time to come up with a good composition. But it’s good to be pushed and the design is not as critical as the thread color lesson.

We learned things like creating vibration by using complementary  colors, how to tone down bright fabrics with the correct value of complementary thread. We also learned how to change mid-tone fabrics with thread and how to break up a monochromatic color scheme with thread. That was just the first day!

The second day we learned how to create luminous neutrals and semi-neutrals and how to animate dark fabric with light thread. Also to make colors glow and creating distance and atmosphere with warm and cool colors. Lots to learn! Usually only a few would get them “right”….but we all learned from the ones that weren’t “right”.

Third day we had to use a piece of hand-dyed fabric in which we needed to find a theme and it’s variations in it. Here’s what I came up with:

DSC_0114

The flowers are all created with thread only. I was able to create some transparency with the thread so the hand-dyed fabric shows through.

We were to select two pieces of hand-dyes that “go together”. I thought I had. My second piece was mostly gray which went well with the grayish tones in the one above, but the thread I put on it changed it so drastically, they hardly seemed like they go together at all. Here’s the second one:

DSC_0125

So on the last day we were instructed to cut them up and put them together into one quilt and we also have to figure out how to create the borders and “sashing” (for lack of better word)…perhaps background fabrics to put these on to make a cohesive and compelling quilt. We have the next year to do this. So you’ll have to stay tuned to see how it turns out!

Happy Quilting!!

Jo

Posted by: jbaner | May 9, 2016

Beginning Quilting Class

I was so busy in April that I had little time to blog what I was doing. I taught a Beginning Quilting class which I like to call “The Basics” which I may change the title to. Even though we make a table runner in the class, it is just a vehicle to learn all the basics.

On the first night we start out by talking about fabric, grain, color, value, contrast, etc., and how to pick out fabrics that go together for this runner and quilts in their futures. Students learn how to use a rotary cutter, safety, and caring for it and the mat. Then how to sew an accurate 1/4″ seam. This is where they get to know their own machines very well. They learn how to read a pattern and how to pick out mistakes that are often written into patterns. I also explain that the table runner is simply a small portion of a large quilt, so if they can make it, then they can make a queen sized quilt! So they go home with homework to pick out their fabric to use for this runner.

The second week they come with their fabrics and we start cutting according to the pattern instructions. Our goal on the first night is to make one block. In that block they learn how to make four-patches, half-square triangles, and all put together into a 9-patch. Their homework is to finish putting all the blocks together.

The third week they learn how to cut setting triangles for putting the blocks on point. Although this may seem like it’s not a beginning task, it’s really not that difficult and  then they are able to go pick out patterns that are on point. They learn how to cut and sew on the bias with all the challenges that come with that. It’s quite satisfying to see that it’s easy to learn. They also learn how to cut and sew borders properly so that their table runner comes out flat and square. Their homework is to finish up the top ready to quilt next week.

The fourth week the students learn how to sandwich and quilt. We stick to stitch in the ditch by using a walking foot. Not enough time in this class to learn free motion, but I did have a separate free motion class the Saturday after this class for those that were interested. They all got it started and we discuss how to create a quilting path so as few as possible thread breaks are needed. Their homework is to finish the quilting.

The fifth week we finish up by squaring the quilt and putting on the binding. We talk about adding a label for history. Then we take pictures. I was so focused on this class that I neglected to take pictures until the last night. So here they are!

And one had to leave early, so I grabbed a photo before she left. Everyone got the binding sewed on, so they just needed to finish up sewing it down when they got home. It was a very fun class!

IMG_2454

IMG_2461

One changed up the order of the blocks in the pattern which is a lovely change. One took liberty with the size of the borders which turned out great for her fabric, and another added an extra border before binding….again added interest changing the size of the finished product. Isn’t that what quilting is all about? If you know the basics you can take liberties with the patterns to make them work the way you want them to. A very successful class!!

I’ll be teaching another one in the fall, so stay tuned!

Happy quilting!

~Jo


Older Posts »

Categories